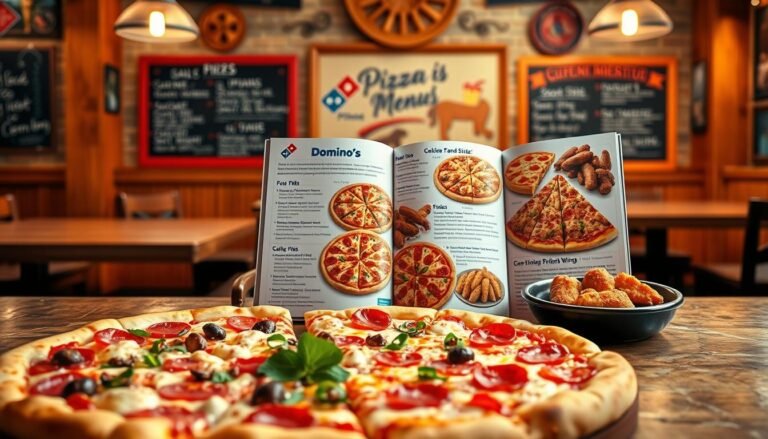
Dominos Taco Pizza
We are excited to share our version of the famous Dominos Taco Pizza, a simple, savory dish you can make at home. This introduction explains what to expect from our copycat recipe and why the chicken taco pizza remains a crowd favorite.
Our recipe recreates the domino chicken taco experience using fresh chicken, bold sauce, and familiar seasonings. We focus on clear steps so each serving tastes consistent, whether you make one pie or several servings for a group.
Domino’s began in 1960 as DomiNick’s and grew after Tom and James bought the shop for $500, renaming it five years later. That history shows how a simple idea became a classic dish many copycat recipes try to match.
In the following sections, we’ll walk through the pizza recipe, sauce tips, and assembly method so you can enjoy a true pizza copycat at home.
The Appeal of Homemade Pizza
Making this copycat at home gives us full control over ingredients and flavor.
We can choose lean chicken, tweak seasoning, and craft the signature sauce to match taste and texture. Taking the time to prepare the chicken taco pizza ensures each slice carries balanced spice and fresh toppings.
Recipe developer and registered dietician Kristen Carli designed this domino chicken taco copycat to deliver the same satisfying notes with healthier choices. Our recipes collection includes this dish because fans love a fresh, made-at-home version that rivals store-bought offerings.
- Control of quality: choose cuts, seasoning, and sauce ingredients.
- Custom timing: adjust cook time for crisp crust or softer bite.
- Repeatable method: follow our recipe steps to match the domino chicken flavor.
| Aspect | Homemade | Store-bought | Why It Matters |
|---|---|---|---|
| Ingredient control | Choose fresh chicken, real spices, and homemade sauce | Prepped mixes, preservatives | Better flavor and nutrition |
| Customization | Adjust spice, cheese, and bake time | Limited options | Fits dietary needs and taste |
| Cost per serving | Moderate with bulk ingredients | Often higher for specialty versions | More value with homemade |
Understanding the Dominos Taco Pizza Concept
We explain how this taco pizza idea blends a classic crust with bright taco-style flavors. The result is a fusion dish that balances crisp dough, seasoned chicken, and a signature sauce.
We analyzed the domino chicken taco to capture its core elements. That study guided our copycat recipe so we keep the same savory-sour balance and familiar texture.
Key points shape the way we build each pizza. A unique sauce defines much of the flavor. Properly seasoned chicken and layered cheese complete the profile.
- Combines pizza structure with taco-seasoned chicken for layered taste.
- Our copycat approach reproduces the domino chicken taco flavor at home.
- Understanding sauce interaction helps us craft consistent, repeatable recipes.
| Element | Why It Matters | How We Recreate It |
|---|---|---|
| Sauce | Defines tang and heat | Blend of tomato, spice, and vinegar for bright flavor |
| Chicken | Main savory protein | Season, cook, and dice to maintain juiciness |
| Crust & Cheese | Texture and melt | Thin-to-medium crust with a mix of mozzarella and cheddar |
Essential Ingredients for Your Kitchen
A few well-chosen ingredients set the foundation for an authentic copycat experience. We keep this list short so gathering items is easy before you start the recipe.
Cheese Varieties
To build the base, we suggest shredded provolone and slices of white american cheese. These create the familiar melt and tang that binds the sauce and chicken together.
Also grab a few slices of american cheese for layering if you prefer extra creaminess. Salt and all-purpose flour belong in the pantry for dough and seasoning balance.
Fresh Produce
Use one cup of fresh produce: a diced Roma tomato, a diced yellow onion, and a diced green bell pepper. These add crunch and bright flavor to the finished pie.
For protein, plan on using a few chicken breasts seasoned with taco seasoning. Our recipes call for three cups total of combined chicken, cheese, and vegetables to keep proportions right.
- Shredded provolone and white american cheese for the melt.
- Roma tomato, yellow onion, and green bell pepper (about one cup diced).
- Chicken breasts and a measured taco seasoning blend.
- Salt, all-purpose flour, and a few slices of american cheese.
- Three cups total of filling ingredients to balance sauce and topping.
| Ingredient | Amount | Purpose |
|---|---|---|
| Shredded provolone | 2 cups | Melt, flavor base |
| White American / American cheese | 4–6 slices | Creaminess and slight tang |
| Chicken breasts | 2–3 breasts (about 2 cups cooked) | Main protein, seasoned for depth |
| Roma tomato, bell pepper, onion | 1 cup diced | Fresh texture and brightness |
| Taco seasoning | 2 tbsp | Season chicken and enhance sauce |
Preparing the Perfect Pizza Dough
Begin at the mixing bowl. For best results use a stand mixer bowl and add yeast, a pinch of sugar, and warm water to activate the yeast.
We follow an easy recipe approach so beginners can get a professional crust. Measure yeast and water carefully; the ratio controls rise and texture.

Next, add flour and salt, then mix on low with the dough hook until a smooth ball forms. Using a stand mixer gives consistent results and saves time.
This recipe easy method creates dough that holds chicken toppings and sauce without sogginess. Let the dough rest, then shape and top for baking.
| Step | Action | Why it matters |
|---|---|---|
| Activate yeast | Yeast + sugar + warm water (5–10 min) | Ensures reliable rise and airiness |
| Mix | Add flour and salt; knead in mixer | Builds gluten for structure and chew |
| Rest | 60–90 minutes at room temp | Develops flavor and stretchability |
Mastering the Yeast Activation Process
Proper yeast activation sets the stage for a light, springy crust every time. We start by proofing active dry yeast in warm water with a pinch of sugar. Then place the bowl under the mixer and use the paddle attachment to combine the mix.
Let the mixture sit undisturbed for about 5 minutes. Tiny bubbles should form and the surface will look foamy. That signals the yeast is active and ready for the dough.
Troubleshooting Bubbles
- If no bubbles appear after 5 minutes, check water temperature; it should be warm, not hot.
- Using a stand mixer to knead dough speeds the process and gives consistent results.
- Once active, we switch to the dough hook and knead dough until elastic for the copycat dish.
| Check | Expected Result | Fix |
|---|---|---|
| Water Temp | 100–110°F | Cool or heat water to range and retry |
| Bubbles in 5 minutes | Light foam forms | Replace yeast or adjust time minutes |
| Dough elasticity | Stretchy, not sticky | Knead dough longer in stand mixer |
Cooking the Chicken for Maximum Flavor
A quick skillet sear followed by a short oven finish ensures tender, juicy chicken for this recipe.
Add about a tablespoon of olive oil to a hot cast iron skillet. Once the oil reaches heat, place the chicken breast in the pan. Sear each side for about four minutes to develop a brown crust.
Transfer the cast iron pan with the seared chicken to a 350°F oven. Roast for roughly 10 minutes so the meat cooks through without drying out.
We always set aside the cooked chicken to rest for a few minutes. Resting keeps juices inside the meat. Then we dice it before adding to the copycat topping.
- Sear both sides in a hot skillet for maximum flavor.
- Finish in the oven in the same cast iron pan for even cooking.
- Let the chicken rest, then dice to combine with sauce and other toppings.
| Step | Time | Why it matters |
|---|---|---|
| Sear | 4 min per side | Builds flavor and color |
| Oven finish | 10 min at 350°F | Ensures fully cooked, tender meat |
| Rest & dice | 5–7 min | Preserves juices for the final dish |
Achieving the Ideal Dough Consistency
We focus on texture: smooth, elastic dough that can carry chicken and sauce.
After your yeast proofs, switch to the dough hook on the stand mixer and knead dough for about eight minutes. Stop when the surface is no longer sticky and the ball feels springy to the touch.
Use a large pan to let the dough rise. A roomy pan allows even expansion and produces a light, airy crust that supports toppings without collapsing.
- Knead dough with steady speed for structure and chew.
- Active dry yeast works well when combined with proper kneading.
- This step makes the copycat recipe sturdy enough for generous chicken and sauce.
| Action | Timing | Tool | Expected Result |
|---|---|---|---|
| Knead until not sticky | ~8 minutes | Stand mixer with dough hook | Elastic, springy dough |
| Bulk rise | 60–90 minutes | Large pan | Light, airy crust |
| Handle before topping | Short rest after rise | Flat surface | Even stretch, holds chicken and sauce |
Rising Techniques for Better Crust
Letting dough rest slowly at room temperature gives the crust time to build flavor and strength.
Place the mixed dough in a large bowl that has been prepped with a tablespoon of olive oil. Cover the bowl with a clean dish towel and let it sit for at least two hours. This rise time is the best way to develop the chew and aroma we want for this copycat recipe.
We use a stand mixer to knead the dough, which saves time and keeps our hands free for other prep. After two hours the dough is ready to shape into a base that will hold chicken, cheese, and savory sauce without collapsing.
- Two hours or more produces deeper flavor and better texture.
- Keep the bowl on a warm side and cover it so the rise stays even.
- Short additional rests of a few minutes make shaping easier before bake time.

| Method | Time | Temperature | Result |
|---|---|---|---|
| Room rise | 2–3 hours | 68–75°F | Better flavor, soft crumb |
| Cold ferment | 12–24 hours | Refrigerated | Complex flavor, chewier texture |
| Quick rise | 45–60 minutes | Warm spot | Faster but milder taste |
Preparing the Oven and Baking Surface
Getting the oven and baking surface right makes the difference between soggy and crisp. We preheat to 475°F so the crust sets fast and the toppings finish evenly.
Roll each dough ball into a 12-inch circle. Place it on a flat pan or a heated pizza stone for best results.
- Preheating to 475 degrees is the best way to get a crispy crust in just a few minutes.
- Use a pizza stone or a flat pan to distribute heat evenly and avoid hot spots.
- A hot oven helps our copycat recipe mimic professional ovens so the chicken and sauce heat through without overbaking.
- Preparing dough in a stand mixer ahead of time frees us to focus on oven and surface prep.
| Baking Surface | Heat Distribution | Result |
|---|---|---|
| Pizza stone | High, even | Crispy bottom, quick bake |
| Flat pan | Good, reliable | Consistent crust, easy handling |
| Perforated sheet | Fast airflow | Thin, crisp edge |
These recipes are designed so careful oven and pan prep produce a restaurant-quality dish. Check bake time and watch the crust so the chicken and sauce stay balanced and hot.
Assembling Your Copycat Creation
Start assembling by laying a thin, even layer of shredded provolone across the stretched dough. This cheese blanket helps the toppings stick and melts into a creamy base for the recipe.
Next, scatter the diced chicken breast over the provolone. Sprinkle one tablespoon of taco seasoning evenly to bring that zesty edge to our chicken taco pizza copycat dish.
Combine one cup of diced vegetables—tomato, bell pepper, and white onion—and add them on top. Finish with chopped white American cheese for extra creaminess.
Set aside bowls with each topping so we can top quickly and slide the pie into the pan and oven without losing heat. This step keeps assembly tidy and helps the sauce stay balanced.
- Provolone first, then diced chicken breast.
- One tbsp taco seasoning per pie; one cup diced vegetables total.
- Adjust white american cheese and sauce to taste.
| Topping | Amount per 12″ pie | Purpose |
|---|---|---|
| Shredded provolone | 1–1.5 cups | Melting base, holds toppings |
| Diced chicken breast | 1–1.5 cups | Main protein, seasoned |
| Tomato, bell pepper, onion | 1 cup combined | Texture and fresh flavor |
| White American cheese | 2–4 slices, chopped | Creamy finish, mild tang |
Selecting the Best Taco Seasoning
A balanced spice blend makes the chicken and sauce sing together on every slice. Choosing the right seasoning is one of the most important steps in our copycat process.
Homemade Spice Blends
We recommend making your own taco seasoning for this recipe. It uses common spices like cumin, chili powder, garlic powder, and a touch of smoked paprika.
Homemade mixes let us control heat and salt. That way the chicken stays juicy and the sauce keeps its bright flavor.
Store-Bought Options
If time is tight, choose a quality packet. Look for blends with natural spices and low sodium.
Some store mixes work well as a quick way to season chicken without changing the overall sauce profile.
- Selecting the best taco seasoning defines the flavor of the chicken and the sauce.
- Experiment with spice levels to match your favorite toppings.
- Master the seasoning and you elevate this copycat dish to pro level.
| Option | Pros | Cons |
|---|---|---|
| Homemade | Custom heat, fresh flavor | Requires measuring spices |
| Store-Bought | Quick, consistent | May contain more salt |
| Mixed (tweak a packet) | Fast with control | Less pure flavor than scratch |
Baking for a Crispy Finish
The final bake is where the dough meets its perfect crisp and the flavors truly meld.
Set your timer for about 12 minutes and slide the pie into a 475°F oven. Twelve minutes at high heat is our suggested time for a golden crust and fully melted cheese.
We recommend a preheated pan or a hot skillet under the dough. That direct heat gives the bottom a quick sear so the crust is crisp without overcooking the chicken or sauce.
Keep a close eye on the bake time. Watch for bubbling cheese and a light brown edge. This short window protects delicate taco seasoning and fresh toppings from burning.

- Bake 12 minutes at 475°F for a crisp crust and melted cheese.
- Use a pizza pan or preheated skillet for even bottom browning.
- Monitor the time so chicken, sauce, and seasoning blend without drying.
| Element | Temp | Time | Result |
|---|---|---|---|
| Preheated skillet | 475°F | 10–12 minutes | Crisp bottom, tender top |
| Pizza pan | 475°F | 12 minutes | Even bake, golden edge |
| Stone | 475°F | 11–12 minutes | Fast heat transfer, chewy crust |
Adding Fresh Toppings After the Oven
Right after the pie comes out of the oven, we add cool, fresh toppings so textures stay crisp and flavors stay bright.
We prep lettuce, tomato, diced red onion, and avocado while the pie bakes. That way we can finish the recipe as soon as the timer goes off.
The contrast of warm chicken and melted cheese with cool toppings is what makes this copycat recipe sing. A dollop of sour cream adds creaminess without weighing the pie down.
- Add lettuce, tomato, and onion after baking to keep crunch.
- Optionally top with crushed red pepper or extra white american cheese for heat or creaminess.
- Sprinkle a light dusting of taco seasoning if you want more zip.
| Fresh Topping | When to Add | Why it Matters |
|---|---|---|
| Lettuce | After bake | Keeps crunch and cool contrast |
| Tomato & Onion | After bake | Brightens flavor and adds texture |
| Avocado & Sour Cream | After bake | Adds creaminess and balances sauce |
| Extra Cheese or Seasoning | Immediately after bake | Melts slightly or infuses topping flavor |
Customizing Your Pizza Experience
Small changes to toppings and seasoning let us make this taco pizza feel new each time.
We start by swapping cheese types and altering sauce amounts. Use provolone, a sharper cheddar, or a mild american slice to change melt and tang.
Next, adjust the chicken and seasoning. Try shredded rotisserie chicken, diced breasts, or thinly sliced grilled chicken to vary texture and bite.
- Increase sauce for juicier slices or use less for a crisp crust.
- Mix cheeses to balance creaminess and stretch.
- Experiment with crunchy or fresh toppings to change mouthfeel.
| Change | Effect | Try |
|---|---|---|
| Cheese | Melt, flavor | Provolone + cheddar |
| Chicken | Texture, protein | Grilled or shredded |
| Sauce & Seasoning | Tang and heat | Extra sauce, pinch of cumin |
Our recipes let us explore many versions without losing the core copycat recipe. By testing combinations we find a favorite chicken taco pizza that fits our kitchen and taste. This copycat dish adapts easily to what we have on hand.
Serving Suggestions for the Perfect Meal
We pair this warm, chicken-topped crust with easy sides so every bite feels complete.
Serve the pie hot from the oven and offer a small bowl of ranch for dipping — it brightens the seasoning and complements the cheese. Cut the pie into even servings so guests can grab a slice quickly.
For a fresh side, toss one cup tomato and one cup onion with a diced pepper and a splash of lime. This salad takes minutes to make and balances the rich sauce and melted cheese.
- Offer ranch or sour cream as a cool dip for contrast.
- Slice into multiple servings so sharing is easy.
- Prepare the tomato and onion salad in a single cup-measured bowl for speed.
| Item | Prep Time | Servings | Why it works |
|---|---|---|---|
| Ranch dip | 1 minute | 8 | Cool contrast to warm chicken and sauce |
| Tomato & onion salad | 5 minutes | 4–6 | Brightens flavor and adds crunch |
| Extra cheese/seasoning | 30 seconds | Varies | Adds richness or a spicy kick |
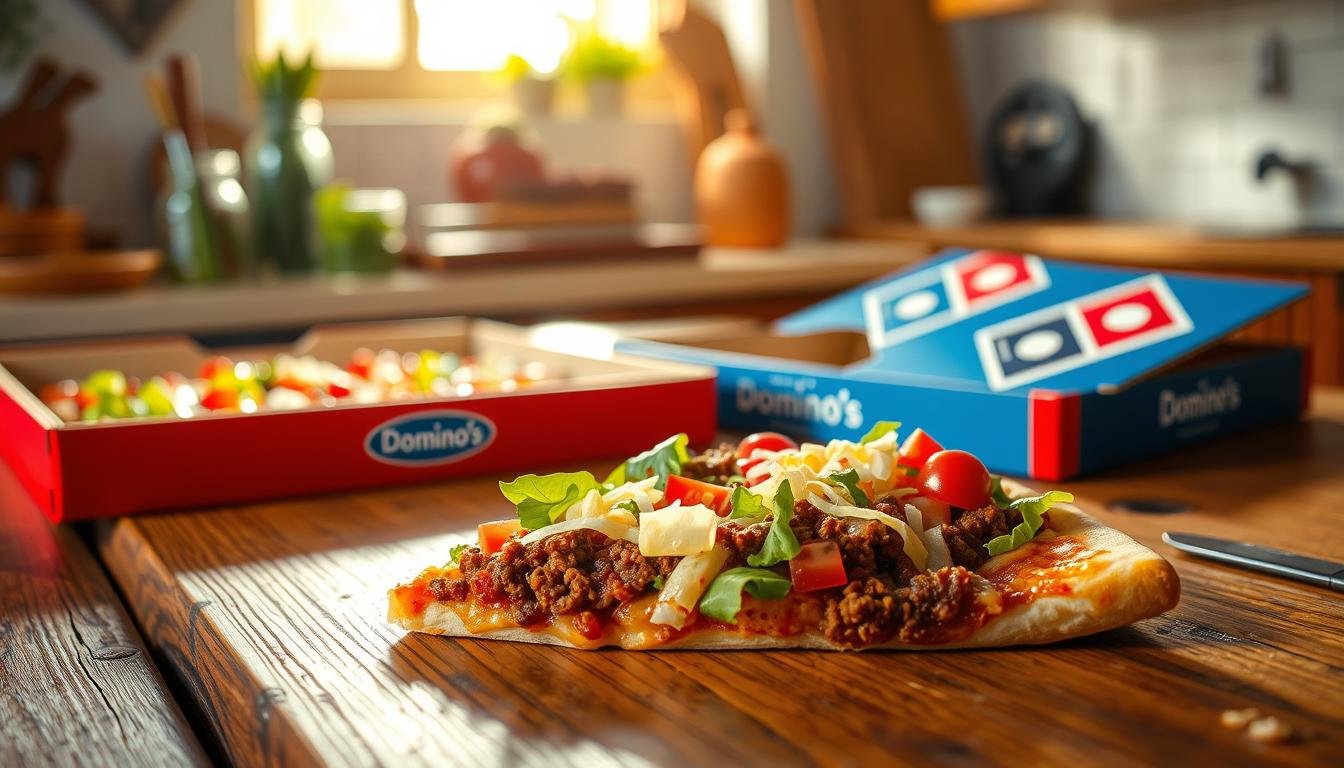
Enjoying Your Homemade Fusion Masterpiece
The true joy arrives when we slice into a warm, cheesy creation and savor the blend of spice and melted cheese. Take a few minutes to let each slice cool slightly so the cheese and toppings settle.
This recipe easy approach shows how we can recreate a domino chicken taco at home. With plenty of cheese and well-cooked chicken, the dish becomes a reliable favorite among our recipes.
Serve hot, pair with a quick salad, and enjoy the comfort of a pizza copycat that proves good flavor comes from simple steps and care.